
Growing rice might seem like a task reserved for large-scale farms in Asia, but with a little effort, you can cultivate your own rice at home—yes, even from store-bought brown rice! This step-by-step guide will walk you through the entire process, from selecting the right rice to harvesting your crop. So, if you’re ready to turn your kitchen staples into a sustainable home project, let’s dive in!
Why Grow Rice at Home?
Before getting started, it’s helpful to understand why growing rice at home can be a rewarding experience. Here are some reasons why:
- Sustainability: Growing your own rice reduces your reliance on commercially produced rice, which often involves heavy use of water, fertilizers, and pesticides.
- Organic Options: You can control what goes into your rice crop, ensuring it’s 100% organic.
- Educational Experience: Rice is one of the world’s most important crops, and growing it offers a hands-on lesson in agriculture and environmental science.
- Self-Sufficiency: Growing your own rice can be a step towards self-sufficiency, especially if you want to rely more on homegrown food.
Can You Grow Rice from Store-Bought Brown Rice?
Yes, you can grow rice from store-bought brown rice, but there are a few caveats. Store-bought brown rice is typically not treated for germination, meaning it hasn’t been hulled or processed in ways that kill its viability. However, not all brown rice will sprout. The best chance for success is with organic or unprocessed brown rice, as these are less likely to have been exposed to chemicals or treatments that inhibit sprouting.
What You Need to Grow Rice
Before you start planting, gather the following materials:
- Organic Brown Rice: Store-bought, untreated brown rice is the key to starting your homegrown rice project.
- Containers or Rice Paddy (if space allows): You’ll need a container that holds at least 6 inches of soil, or a small area in your yard where you can simulate a paddy field.
- Water Source: Rice requires a lot of water to grow, so you’ll need a consistent water supply.
- Soil: Rich, loamy soil with plenty of organic material will give your rice the nutrients it needs.
- Sunlight: Rice needs full sunlight to thrive, so place your containers or paddy in an area that receives at least 6 hours of direct sunlight daily.
Step-by-Step Guide to Growing Rice from Brown Rice
Step 1: Soak the Rice
Start by soaking your brown rice to activate the germination process. Take 1 cup of brown rice and place it in a bowl of water. Allow the rice to soak for 24 hours. This step is crucial as it softens the rice and encourages sprouting.
Step 2: Prepare the Growing Medium
While your rice is soaking, prepare your growing medium. Rice grows best in wet, muddy soil, so if you’re using containers, make sure they have no drainage holes to retain water. Fill your containers or paddy area with a mix of soil and compost, creating a rich growing environment.
Step 3: Plant the Rice
Once your rice has soaked for 24 hours, it’s time to plant. Scatter the soaked rice seeds evenly over the surface of the soil. You don’t need to plant them too deeply—just press them lightly into the soil so they are covered. If using a container, aim to plant the rice seeds about 1 inch apart.
Step 4: Keep the Soil Flooded
Rice thrives in flooded conditions, so your growing medium should be consistently wet. Water the area so that there is about 1-2 inches of water standing above the soil surface. This simulates the natural conditions of a rice paddy. Keep this level of water throughout the growth cycle, ensuring the soil stays submerged.
Step 5: Maintain Ideal Conditions
- Temperature: Rice grows best in temperatures between 70°F and 95°F (21°C to 35°C). Make sure the environment stays warm, especially if you’re growing indoors or in a cooler climate.
- Sunlight: Place your container in an area where it receives at least 6 hours of direct sunlight. Rice needs a lot of sunlight to grow efficiently.
- Weeding: Weeds can compete with your rice plants for nutrients. Be sure to regularly check for and remove any unwanted plants in your growing area.
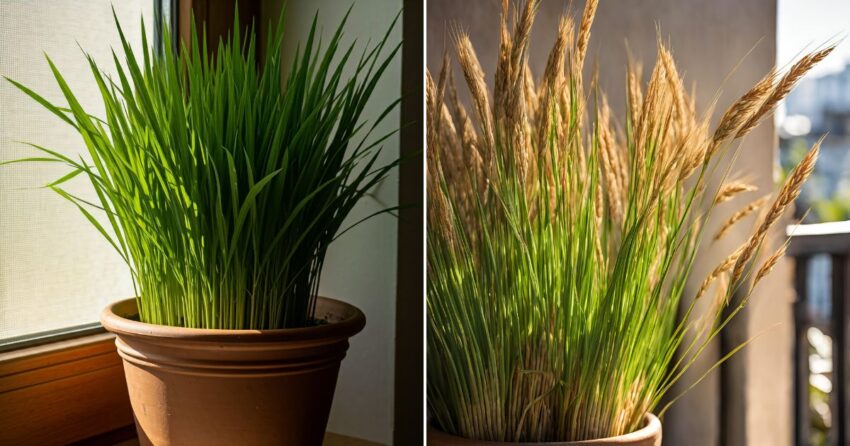
Step 6: Watch for Growth Stages
Rice goes through several stages of growth:
- Germination: Within a week, you should notice small green shoots emerging from the soil.
- Tillering: About a month after planting, your rice plants will start to tiller, producing multiple stems.
- Flowering: After about three months, your rice plants will begin to flower, signaling that the grains are forming.
Step 7: Drain the Water
As your rice begins to mature (about 3-4 months after planting), the grains will start to harden and turn golden. This is a sign that it’s almost time to harvest. About two weeks before harvesting, drain all the water from your container or paddy to allow the rice to dry out.
Step 8: Harvest the Rice
Once the rice grains are fully mature and dry, it’s time to harvest. Cut the rice stalks close to the ground and gather them in bunches. Let the harvested stalks dry in the sun for a few days.
Step 9: Remove the Rice Grains
After the stalks are completely dry, you can thresh the rice. This involves separating the grains from the stalks. You can do this by gently beating the stalks against a hard surface or rubbing them between your hands. Once you’ve collected the grains, spread them out to further dry in the sun.
Step 10: Dehull the Rice (Optional)
Rice harvested from brown rice will still have its husk intact. If you want to eat your rice immediately, you can remove the husk by hand using a mortar and pestle or leave it as is for brown rice.
Tips for Successful Rice Growing
- Monitor Water Levels: Keeping the water levels consistent is key to a healthy rice crop. Check regularly to ensure the water doesn’t dry out, but avoid over-flooding the plants.
- Patience is Key: Rice has a long growing season of about 4 to 6 months, depending on your climate and growing conditions, so patience is essential.
- Prevent Pests: Keep an eye out for pests like snails or birds that might enjoy your rice as much as you do. Use organic deterrents to keep them away.
Benefits of Growing Rice at Home
- Healthier Grains: Growing rice at home allows you to control the growing process, resulting in healthier, pesticide-free grains.
- Environmental Impact: Reducing reliance on commercial rice production helps cut down on water and chemical use in large-scale farming.
- Satisfaction of Harvesting: Few things are more satisfying than harvesting a crop that you’ve nurtured from seed to grain.
Final Thoughts
Growing rice from store-bought brown rice may take time and effort, but the results are rewarding. By following this guide, you’ll not only produce your own crop of rice but also gain a deeper appreciation for one of the world’s most important foods. So why not give it a try? With some organic brown rice, soil, water, and sunlight, you can enjoy the experience of growing rice right at home!