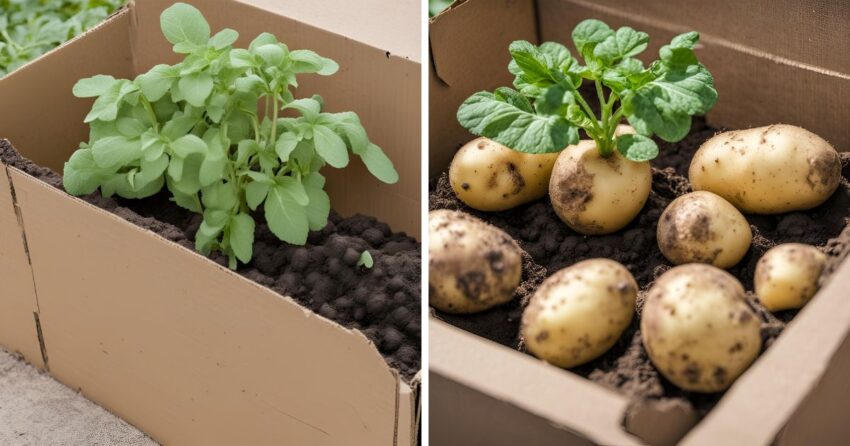
Growing potatoes in a cardboard box is a fun, easy, and space-saving way to enjoy homegrown spuds. Whether you’re a seasoned gardener or a beginner, this method is straightforward and yields a bountiful harvest with minimal effort. Here’s a step-by-step guide on how to grow potatoes in a cardboard box.
Why Grow Potatoes in a Cardboard Box?
Growing potatoes in a cardboard box has several advantages:
- Space-saving: Perfect for small gardens, patios, or balconies.
- Low cost: Reuses materials you likely already have.
- Ease of access: Makes harvesting potatoes simple and mess-free.
- Soil health: Reduces the risk of soil-borne diseases and pests.
Materials Needed
Before you start, gather the following materials:
- A large, sturdy cardboard box
- Seed potatoes (certified disease-free)
- Potting soil or compost
- Straw or shredded leaves
- Watering can or hose
- A sunny spot
Step-by-Step Guide
1. Choose the Right Potatoes
Select seed potatoes from a garden center or nursery. Look for varieties suited to your climate and preferences. Certified seed potatoes are recommended because they are disease-free and produce reliable yields.
2. Prepare the Cardboard Box
Choose a large, sturdy cardboard box. The box needs to be deep enough to allow the potatoes to grow and spread. Line the bottom with a few layers of newspaper to provide extra stability and prevent soil from falling out.
3. Add Soil
Fill the box with about 4 inches of potting soil or compost. Potatoes need well-drained, nutrient-rich soil to thrive. Avoid using garden soil as it may contain pests or diseases.
4. Plant the Seed Potatoes
Cut the seed potatoes into pieces, ensuring each piece has at least one or two eyes (sprouts). Let the cut pieces dry for a day to form a protective layer over the cut surfaces. This helps prevent rot. Plant the pieces in the soil, eyes facing up, about 6 inches apart.
5. Cover and Water
Lightly cover the seed potatoes with another 2 inches of soil. Water thoroughly but gently to avoid displacing the soil. Keep the soil consistently moist but not waterlogged.
6. Add More Soil as They Grow
As the potato plants grow, add more soil or straw to cover the stems, leaving just the top leaves exposed. This process, called “hilling,” encourages more tuber production along the buried stems. Repeat this until the box is nearly full.
7. Maintain and Monitor
Place the box in a sunny spot where the plants can get at least 6-8 hours of sunlight daily. Water regularly to keep the soil moist, especially during dry spells. Watch for pests like aphids and beetles, and address them promptly using organic or chemical controls.
8. Harvesting
Potatoes are usually ready to harvest when the plants start to flower. For new potatoes, harvest a few weeks after flowering begins. For larger, mature potatoes, wait until the foliage turns yellow and dies back. Simply cut away the sides of the box to access your potatoes, making the harvest easy and mess-free.
Tips for Success
- Rotate Crops: Avoid planting potatoes in the same spot each year to prevent soil-borne diseases.
- Choose Disease-Resistant Varieties: Opt for varieties that resist common potato diseases like blight.
- Monitor Moisture: Ensure consistent watering, but avoid waterlogging to prevent rot.
- Mulch: Use straw or shredded leaves to help retain moisture and suppress weeds.
Benefits of This Method
Growing potatoes in a cardboard box is not only efficient but also environmentally friendly. The box eventually decomposes, adding organic matter to the soil. This method is perfect for urban gardeners with limited space and those looking to minimize their gardening footprint.
Conclusion
Growing potatoes in a cardboard box is an innovative and practical way to produce your own fresh, delicious potatoes. With minimal materials and effort, you can enjoy a bountiful harvest right from your balcony, patio, or small garden space. Follow these simple steps, and you’ll be digging up your own homegrown spuds in no time. Happy gardening!

